Piro2 - Blog
Dec 31st, 2016 - Some progress on various fronts
After I posted my previous blog post, I found a Robot Rebels forum, and decided to create a thread for my Piro2 robot on that forum. It looks to be a friendly place to share ideas and see all sorts of robotic projects people are working on.
For the past couple of weeks, I have been continuing my work on Piro2. I have not managed to make any major progress, I have spent most of my time studying link-grammar and trying to figure out how best to utilize it. I also switched to using 64 separate POS tags, to get somewhat more accurate tagging, and as I realized that using the smaller dictionary saves me over 2 megabytes of RAM, so I can afford to spend one megabyte for the POS n-gram probability table.
I enhanced my POS tags in a way that the first 32 tags stayed basically the same, I just added a second block of 32 tags for the more specific parts of speech. For example, in my original set I only had a tag POS_BE for all the 'be' verb variants, while in the 64-tag set I have all separate tags for all the different variants, much like in the original Brown tag set. I also separated the 'plus' tags, meaning a combined word that contains several parts of speech in a single word (like "there's" = "there is") for each of the main POS tag types. In the 32-tag set I had a single 'POS_PL' tag to handle all of these.
// Additional tags, if using 64 POS tags: // More distinct "BE" tags: POS_BENOT, // 32 = BED* BEDZ* BER* BEZ* (weren't, wasn't, aren't, isn't) POS_WERE, // 33 = BED (were) POS_WAS, // 34 = BEDZ (was) POS_BEING, // 35 = BEG (being) POS_AM, // 36 = BEM (am) POS_BEEN, // 37 = BEN (been) POS_ARE, // 38 = BER (are) POS_IS, // 39 = BEZ (is) // More distinct "DO" tags: POS_DONOT, // 40 = DO* DOD* DOZ* (don't, didn't, doesn't) POS_DID, // 41 = DOD (did) (done uses VBN) POS_DOES, // 42 = DOZ (does) (doing uses VBG) // Combined determiners: POS_DTPLUS, // 43 = DT+BEZ DT+MD (that's = that is, that'll = that will) // Combined "EX" tags: POS_EXPLUS, // 44 = EX+BEZ EX+HVD EX+MD (there's = there is, there'd = there had, there'll = there will) // More distinct "HV" tags: POS_HVNOT, // 45 = HV* HVD* HVZ* (haven't, hadn't, hasn't) POS_HAD, // 46 = HVD (had) (also HVN) POS_HAVING, // 47 = HVG (having) POS_HAS, // 48 = HVZ (has) // Modal auxiliary "MD": POS_MDNOT, // 49 = MD* (can't, won't, couldn't, ...) POS_MDPLUS, // 50 = MD+HV MD+TO ("coulda"="could have", "shouldda"="should have", "woulda"="would have", "oughta"="ought to") // Plural noun: POS_NNS, // 51 = plural noun // Ordinal numeral: POS_OD, // 52 = OD (first, 2nd) // Combined nominal pronouns: POS_PNPLUS, // 53 = PN+BEZ PN+HVD PN+HVZ (nothing's = nothing is, nobody'd = nobody had, nobody's = nobody has) // Combined personal pronouns: POS_PPPLUS, // 54 = PPS+BEZ PPSS+BEM ... (it's, it'd, I'm, you're, they'll, ...) // Combined adverbs: POS_RBPLUS, // 55 = RB+BEZ (here's) // More distinct "VB" tags: POS_VBPLUS, // 56 = VB+AT VB+IN VB+PPO VB+RP VB+TO VBG+TO VBN+TO ("wanna"="want a", "lookit"="look at", "let's"="let us", "c'mon"="come on", "wanta"="want to", "wanna"="want to", "gonna"="going to", "gotta"="got to") POS_VBD, // 57 = verb, past tense�(looked) POS_VBG, // 58 = verb, present participle/gerund�(looking) POS_VBN, // 59 = verb, past participle�(looked) POS_VBZ, // 60 = verb, 3rd. singular present�(looks) // Combined wh-determiners, wh-pronouns, wh-adverbs: POS_WDPLUS, // 61 = WDT+BER WDT+BEZ WDT+DOD WDT+HVZ ("what're"="what are", "what's"="what is", "what'd"="what did", "what's"="what has") POS_WPPLUS, // 62 = WPS+BEZ WPS+HVD WPS+MD ("that's"="that is", "who's"="who is", "who'd"="who had", "that'll"="that will") POS_WRPLUS // 63 = WRB+BEZ WRB+DOD WRB+DOZ WRB+MD ("where's"="where is", "how's"="how is", "where'd"="where did", "how'd"="how did")
I also counted how many words there are in each of the tags in the Brown corpus while loading the Brown corpus data and combining it with the Sphinx dictionary. This is a list of the counts (note that the sum of these counts is much larger than the around 32000 words in the dictionary, as many words can have several POS tags):
	tag '-' word count = 0
	tag '.' word count = 15
	tag 'NOT' word count = 8
	tag 'AB' word count = 12
	tag 'AP' word count = 48
	tag 'AT' word count = 34
	tag 'BE' word count = 3
	tag 'CC' word count = 32
	tag 'CD' word count = 168
	tag 'CS' word count = 62
	tag 'DO' word count = 4
	tag 'DT' word count = 31
	tag 'EX' word count = 4
	tag 'HV' word count = 6
	tag 'IN' word count = 194
	tag 'JJ' word count = 8360
	tag 'MD' word count = 36
	tag 'NN' word count = 16183
	tag 'NP' word count = 0
	tag 'NR' word count = 54
	tag '+' word count = 38
	tag 'PN' word count = 43
	tag 'PP' word count = 123
	tag 'QL' word count = 394
	tag 'RB' word count = 1941
	tag 'TO' word count = 3
	tag 'UH' word count = 197
	tag 'VB' word count = 2793
	tag 'WD' word count = 13
	tag 'WP' word count = 19
	tag 'WQ' word count = 3
	tag 'WR' word count = 25
	tag 'BE*' word count = 11
	tag 'BED' word count = 3
	tag 'BEDZ' word count = 2
	tag 'BEG' word count = 5
	tag 'BEM' word count = 2
	tag 'BEN' word count = 2
	tag 'BER' word count = 8
	tag 'BEZ' word count = 5
	tag 'DO*' word count = 9
	tag 'DOD' word count = 3
	tag 'DOZ' word count = 2
	tag 'DT+' word count = 8
	tag 'EX+' word count = 6
	tag 'HV*' word count = 6
	tag 'HVD' word count = 4
	tag 'HVG' word count = 3
	tag 'HVZ' word count = 3
	tag 'MD*' word count = 14
	tag 'MD+' word count = 7
	tag 'NNS' word count = 7527
	tag 'OD' word count = 72
	tag 'PN+' word count = 9
	tag 'PP+' word count = 69
	tag 'RB+' word count = 3
	tag 'VB+' word count = 14
	tag 'VBD' word count = 2332
	tag 'VBG' word count = 2726
	tag 'VBN' word count = 3107
	tag 'VBZ' word count = 1252
	tag 'WD+' word count = 5
	tag 'WP+' word count = 10
	tag 'WR+' word count = 8
Link-grammar work
Next, I began testing how I could use the link-grammar code with my dictionary that is based on a combination of the Brown corpus and the Sphinx dictionary. As I mentioned in my previous blog post, I did not want to spend memory space for yet another dictionary just for link-grammar.
At first I did some experiments with the tiny.dict simple grammar file that comes with the link-grammar package, but soon realized that it is too simple and cannot handle anything but the simplest of sentences. After that failed test I decide to check how many different expressions there are in the dictionary file. since the full dictionary of link-grammar is much larger than the 32000-word dictionary I currently use, I decided to code a test program that loads only those words from the link-grammar 4.0.dict file that I have in my dictionary, and then prints all the expressions. I could then use sort -u | wc -l to count the number of different expressions. I thought that if this number is 1023 or less, I could then just load those expressions, and enhance my dictionary so that each word and POS tag has an index into this expression. This would then also improve the performance of the link-grammar system, as the code would not need to find each word from the dictionary.
After I ran my test program, I noticed that the number of expressions was over 2600, and I also noticed that several dozen words that I have in my dictionary do not exist in the link-grammar dictionary. So, I decided to abandon this idea. Instead, I decided to start working on my own link-grammar dictionary that would be based on my POS tags instead of separate words, so that I could give the POS tag of the word instead of the word itself to the link-grammar parser as input. As you can see from the above POS tag count list, many of the POS tags contain a "closed class" of words, meaning that the word count is relatively small and is not very likely to change. These words I could still have separately in my grammar, but the open classes (nouns, adjectives, verbs and adverbs) I could handle using just the POS tag. I can still have word-specific special cases for open-class words if I want to, but in general the open-class words will be handled using the POS tag.
I have just managed to create a link-grammar dictionary that has all those 64 different POS tags handled, but I have not yet implemented code that handles this grammar file in my Piro2 robot program.
Hardware work
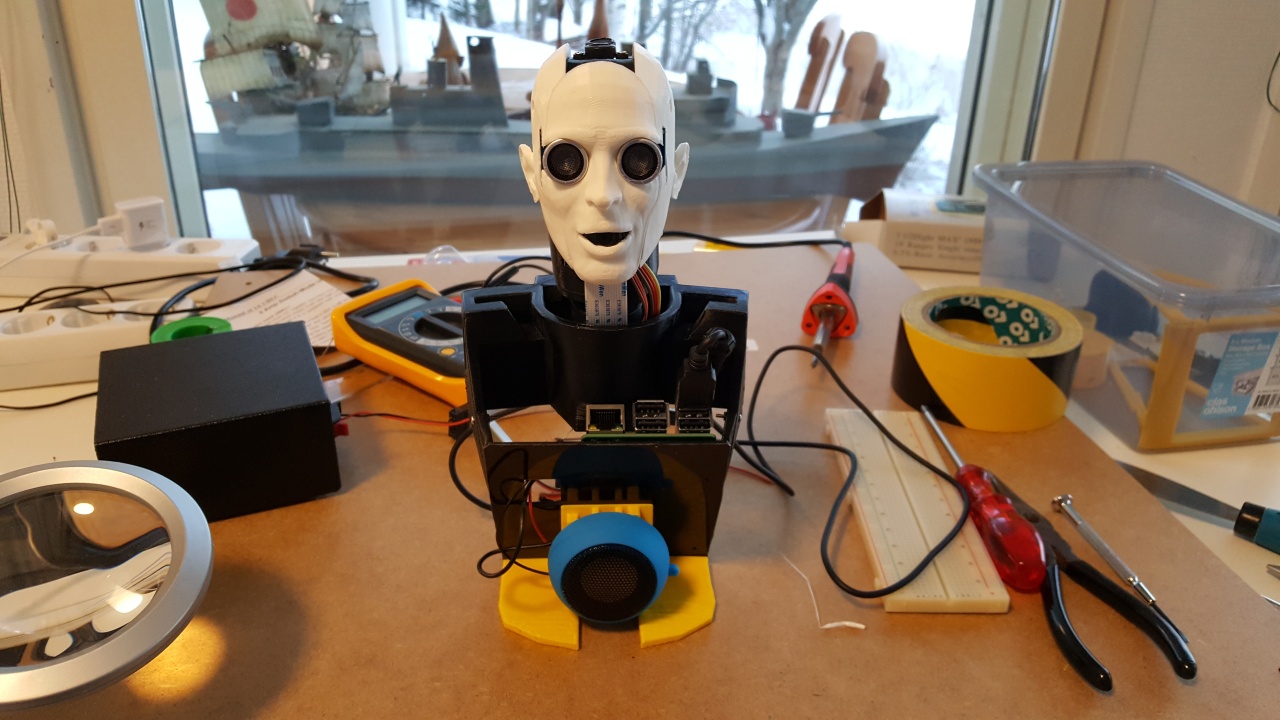
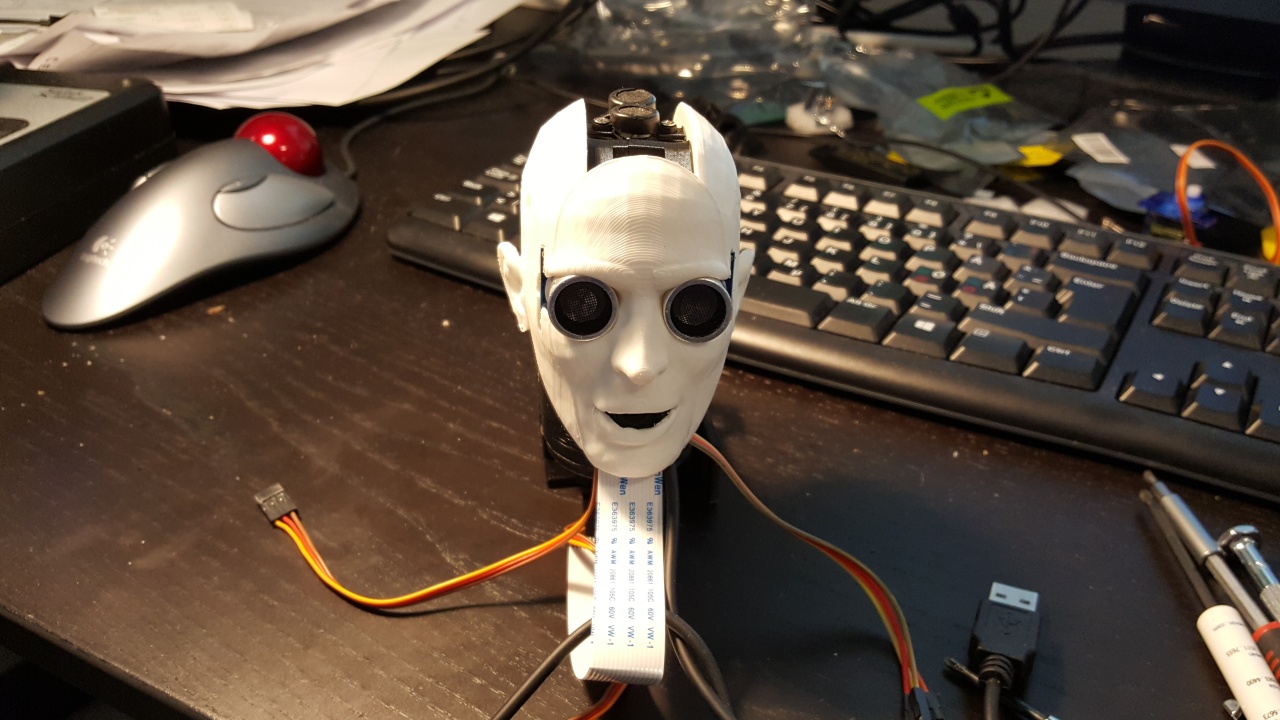
Around Christmas I also reassembled the head of my robot. The first step was to disassemble the head so that I could detach the neck servo holder. I needed to separate this from the servo so that I could properly tighten both of the screws that hold this servo in place. At the same time, I decided to test that these cheap servos from China actually work. I decided to use my old original Raspberry Pi for these servo tests (just in case they have a short circuit or happen to otherwise kill my raspberry Pi), using the Servoblaster program. Actually, testing my old servos using the Servoblaster was the first step in my original Piro robot, back in June of 2015 (which was when the video below was taken).
At that time, I had not written down how I actually performed that test, and had since forgotten what steps were required, so I had to look this up again when testing the new servos. This time I wrote down the steps:
	cd rpix86/servoblaster
	sudo servod
	echo 0=150 > /dev/servoblaster 	(center value for TowerPro servos)
	echo 0=60 > /dev/servoblaster 	(minimum safe value for TowerPro servos)
	echo 0=230 > /dev/servoblaster 	(maximum safe value for TowerPro servos)
The signal wires of the new servos are color-coded so that red is VCC (+5v) and should be connected to pin 2 on the Pi, yellow is the signal wire and should be connected to pin 7, and brown is the ground wire and should be connected to pin 9 (or any other GND pin) on the Raspberry Pi. All the servos I tested worked fine.
The next step was then to switch the too-short wires I had going from the MPU-6050 to the robot body with the longer wires I had purchased. I had assumed the wires I used were only 15cm long, but in fact they were 20cm long, so I had to switch to the longer 30cm wires. I had not connected the HC-SR04 ultrasonic distance sensor at all yet, so I wanted to finally connect that as well. I checked some instructions about interfacing it, and noticed that you cannot directly attach the Echo pin to your Raspberry Pi, because the Pi GPIO pins have a signal level of 3.3V and the HC-SR04 uses 5 volts. So, I did some soldering and managed the create a voltage divider using two resistors like in those instructions. However, I also noticed that I should have left more room for the HC-SR04 wires in my 3D printed robot head, as I had a hard time assembling my head back together with all the wires running inside the head. I will perhaps need to do some remodeling and reprinting for the head parts at some point.
Source directory structure cleanup
I am not very good at building Makefiles, so I have been using pretty much the same Makefile with just minor changes (compiler flags and such) ever since I started programming for various devices with my DSx86 project. The good thing with the Makefile I have been using has been that I do not need to make any changes to it when I add new source files to my program, the Makefile scans all files in the source and include directories when building the executable. However, that has limited me to put all my source files into a single directory, which has been a bit of a problem, especially now that I use a lot of code from PocketSphinx, code from OpenCV, code for POS tagger, and so on.
So, now I decided to look into my Makefile to see how much work it would be to add support for subdirectories to group sources for different features together. It turned out to be much simpler than I thought, the Makefile actually already had support for it, I just hadn't realized it! My original Makefile had this:
SOURCES		:=	source
INCLUDES	:=	include
I tested what happens if I just add the subdirectories to those definitions, and that simple change worked just the way I wanted, so now I have subdirectories for the separate features in my system. Nice!
SOURCES		:=	source source/sphinx source/pos_tagger source/vision
INCLUDES	:=	include include/sphinx
JSGF grammar
After some cleaning up of my Piro2 source code directories, I started integrating the Brown corpus and POS tagger work to my main Piro2 software. However, when testing the speech recognition, I again ran into the problem of how poor the recognition accuracy actually is, when using the full n-gram search algorithm.
Thus, I decided to again look into the available search modes of Pocketsphinx. I had used keyword search in the original Piro. It only tries to detect certain keywords from the speech and thus is very fast, but I had some trouble tuning the detection threshold. It seemed to either generate a lot of false positive detections, or else failed to detect the command.
For my Piro2 project I have been attempting to use the n-gram search, which uses an English language model and tries to detect all the speech. I have managed to speed it up quite a bit, so that it might be usable performance-wise, but the problem is the relatively low detection accuracy. There are just so many words that sound quite similar to each other.
I only now noticed that there are a couple of other searches as well, grammar search and allphone search. The latter seemed to be something that detects phonemes rather than words, so I decided to take a closer look at the grammar search. When using a grammar search, Sphinx uses a JSGF grammar specification to define the valid sentences that can be recognized. I used the example provided by Sphinx as a basis for my own JSGF grammar that contained only the sentences I had spoken into the test WAV file I have been using for my 'sphinxtest' Sphinx profiling program. This resulted in a completely accurate detection, and performing the detection over the 7+ second WAV file only took 1.31 seconds. So, it looks like this might be the way to go for Piro2. Here is the profiling run result:
  %   cumulative   self              self     total
 time   seconds   seconds    calls  ms/call  ms/call  name
 25.95      0.34     0.34                             eval_cb
  6.87      0.43     0.09      710     0.13     0.13  fe_write_frame
  6.87      0.52     0.09                             eval_topn
  6.87      0.61     0.09                             ptm_mgau_senone_eval
  4.58      0.67     0.06   786774     0.00     0.00  delete
  3.82      0.72     0.05   183822     0.00     0.00  bin_mdef_phone_id
  3.05      0.76     0.04   786774     0.00     0.00  fe_prespch_ncep
  3.05      0.80     0.04   398446     0.00     0.00  enter
  3.05      0.84     0.04        1    40.00    85.50  create_search_tree
  2.29      0.87     0.03   474577     0.00     0.00  __ckd_calloc__
	...
  0.00      1.31     0.00   700436     0.00     0.00  glist_free
One of my main goals with Piro2 is to create a robot that I could actually talk to, instead of just giving it commands, so I fear a strict grammar of allowed sentences would not be very suitable for achieving this goal. However, I am thinking that perhaps the best way would be to have some sort of dynamic grammar, so that Piro2 could increase and decrease the number of allowed sentences or words on the fly. If it asks me a question, for example, it could limit the detected sentences to something relevant as the reply. If the question is a yes/no question, then the reply can only be yes or no or something close to those (yeah, nope, right, wrong, true, false, correct, incorrect, affirmative, ...).
I will need to look into the grammar detection system in sphinx more closely, to understand how it converts the JSGF grammar to some internal data structures. Adjusting these internal data structures on the fly would probably help me towards my goal.
Computer vision work
I also decided to copy my old OpenCV face detection routines from my original Piro solution to my new Piro2 program. I had not yet tested the actual face recognition using the new camera, so I wondered if the same code will work without changes. Everything seemed to work fine, and after a little bit of work I got Piro2 to detect my face.
In the original Piro I did not have any good way to actually debug the face detection, I just had some print statements to print the coordinates of the detected face. However, now that my plan is to enhance the face detection system for Piro2, I decided to add a proper BMP file dumping system, and also added some simple code to draw a rectangle around the detected face. Here below are a couple of detection results.
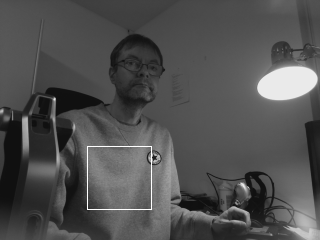
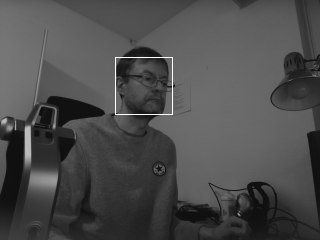
The first image was weird, at first I thought there was something wrong with my rectangle drawing routine. When I turned off my desk lamp, though, the algorithm detected my face instead of my shirt, and the rectangle seemed to be in the correct position. So I believe the light from my desk lamp created some shadows on my shirt that looked like a face to the face detection algorithm (which is based on the Haar cascade from OpenCV).
In my original Piro I decided to go with a 320x240 image size for face detection, as that way I could have it run at a reasonable speed, something like 5 frames per second. However, that pretty much limits the distance that my robot can detect a face to something at most a meter away from the robot (in the above images my face is around 60-70 cm away from the robot's head). My plan is to switch to at least 640x480 or possibly even to 1280x720 (or 1280x1024) camera image size, and then do some sort of preprocessing to quickly find areas of the image that might contain a face, and only then call the Haar cascade face detection using a 320x240 subimage where a face might be found. I am not sure yet what sort of a preprocessing might work, but I would like to try something based on movement detection. Detecting movement could be useful in other ways as well.
Next steps
As you read above, I have been working on multiple fronts, as I have been having various difficulties in each feature I want my robot to have. I will probably continue working on each of these features going forward as well. I have a lot of ideas, but it takes time to implement and test each of these ideas, so I don't expect to achieve any major progress for a while yet.
Happy new year everyone!
Dec 18th, 2016 - Natural Language Processing
As I mentioned in my previous blog post, I shifted my focus from hardware to software, after I got the main frame of Piro2 assembled. I started by downloading WordNet and then used some of my old state machine code to load the index files of WordNet to memory. However, after studying the general problem of natural language processing, I realized that before I can have my robot understand what I speak to it, I need to do some preprocessing steps. So I decided to write down the steps I need to do, and then start looking for algorithms and code that would perform those steps, one step at a time. The steps I believe I need are:
- Speech recognition. I think I have this pretty much covered with my use of Pocketsphinx.
- Part-of-speech tagging. This I think is the first part for making sense of the sentence, after I get an ASCII text sentence from the speech at the previous step. I need to know which word is a verb, which is a noun, which is an adjective, and so on.
- Sentence parsing. After I get the part-of-speech tags, I can try to parse the sentence structure, to find out the subject and object of an action, for example.
- Word sense disambiguation. This is a hard problem, and I don't know yet how to handle this. Many words in English can have several meanings, and before my robot can understand me it needs to know which of those meanings is relevant to the current discussion. I think WordNet can help at this step, as it has collected the various meanings for each English word, but I don't yet know quite how.
- The last step is then the actual artificial intelligence handling, where the robot would use the sentence I spoke to it in some intelligent way. Perform an operation, answer a question, or integrate the new knowledge into it's knowledge base. This is the main focus for my interest.
Part-of-speech tagging
Most of my time during the past couple of weeks was spent implementing part-of-speech tagging for Piro2. I looked into various part-of-speech taggers I found on the net, but they seemed to gerenally be part of some larger NLP toolkit, or were written in Python or some other language that I am not so familiar with. Eventually I found Citar, a Trigram HMM part-of-speech tagger by Dani�l de Kok, which although it had been written in Go (yet another unfamiliar language) also had a C++ version available. This C++ version had some model files based on the Brown corpus that were ready to use by the tagger. I downloaded these model files and began experimenting with them.
Here is the licensing statement for Citar:
Citar is a simple part-of-speech tagger, based on a trigram Hidden
Markov Model (HMM). It (partly) implements the ideas set forth in
[1]. Citar is written in C++.

Citar is licensed under the GNU Lesser General Public License
version 3.0.

[1] TnT - a statistical part-of-speech tagger, Thorsten Brants, 2000
This is the statement for the Brown Corpus:
BROWN CORPUS

A Standard Corpus of Present-Day Edited American
English, for use with Digital Computers.

by W. N. Francis and H. Kucera (1964)
Department of Linguistics, Brown University
Providence, Rhode Island, USA

Revised 1971, Revised and Amplified 1979

http://www.hit.uib.no/icame/brown/bcm.html

Distributed with the permission of the copyright holder,
redistribution permitted.
After studying the C++ version of Citar I realized how rusty my C++ knowledge is, as I have never actually programmed in C++ and have always disliked it's syntax. Luckily I found out that Daniel de Kok had also released a Java version of Citar, called Jitar. I am much more fluent in Java than in C++, so I began studying the Jitar source code while building similar algorithms in plain C language for my needs in Piro2.
I have gotten reasonably familiar with the terms like Hidden Markov Model (HMM) and n-gram when working with Sphinx, so I did not have all that much trouble understanding how the Jitar code worked. I had to replace all the HashMaps and other java-specific data structures with something simpler for my C version, though. In my original version I simplified the POS tags down to 128 and used a 1283 -item table to store the unigram, bigram and trigram probabilities. This was so that I could quickly access any probability using a simple table lookup, instead of a bsearch or hash table lookup that would take more time. However, even when using float (instead of double) values, this table takes 8 megabytes of memory, which I thought was a bit too much for just a single algorithm in my multi-step natural language processing code.
In the end I simplified the tag set down to 32, so that my n-gram probability table is only 323 or 32768 items, for 4*32768 = 128KB of RAM used. I also limited each word in the Brown corpus to only have at most 4 part-of-speech tags (even though some words in English like "well" or "right" or "still" can have more), so that I could use a 4-item table to store the word-specific POS tags and another 4-item table to store the tag probabilities. I sorted the Brown corpus tag frequencies so that I only take the four most common part-of-speech tags into my tables. This also meant that I could simplify the backtracking table of the Viterbi algorithm from a complex tree structure in Jitar down to a simple two-dimensional table having n rows and 4 columns, as each state can only have at most four back pointers.
This is the simplified and compressed tag set I currently use in my tagger:
typedef enum {
	POS_NONE = 0,			// 0 = non-existing tag marker
	POS_SYM,			// 1 = symbol . ? , ( ) ...
	POS_NOT,			// 2 = not = "ne * 1","nawt * 1","nott * 2","Not * 43","Non RB 1 * 1","Pas * 1","non JJ 1 RB 2 * 5","not * 4567"
	POS_AB,				// 3 = pre-qualifier/pre-quantifier (quite, rather, such, half, all, nary, both)
	POS_AP,				// 4 = post-determiner (much, fewer, last, many, little, next, same, least, other, ...)
	POS_AT,				// 5 = article (a, the, no, every, das, die, ...)
	POS_BE,				// 6 = be (be, were, weren't, was, wasn't, bein, bein', being, am, been, are, art, sind, aren't, ain't, is, ist, isn't)
	POS_CC,				// 7 = coordinating conjunction (and, or, but, either, neither)
	POS_CD,				// 8 = cardinal / ordinal numeral
	POS_CS,				// 9 = subordinating conjunction (before, until, whereas, although, because, that, if, unless, than, ...)
	POS_DO,				// 10 = do (do, don't, did, didn't, does, doesn't)
	POS_DT,				// 11 = singular/plural determiner (this, that, each, another, some, any, these, those, either, neither)
	POS_EX,				// 12 = existential there (there)
	POS_HV,				// 13 = have (have, haven't, ain't, had, hadn't, having, has, hasn't)
	POS_IN,				// 14 = preposition (at, in, with, through, ...)
	POS_JJ,				// 15 = adjective
	POS_MD,				// 16 = modal auxiliary (can, may, must, could. might, should, can't, cannot, shouldn't, ...)
	POS_NN,				// 17 = noun
	POS_NP,				// 18 = proper noun
	POS_NR,				// 19 = adverbial noun (today, yesterday, Monday, home, Saturdays)
	POS_PL,				// 20 = plus, several words combined (I'm, what's, could've, it's, coulda, hafta, there's, there'd, there'll, that's, that'll, ...)
	POS_PN,				// 21 = nominal pronoun (nothing, something, everything, ...)
	POS_PP,				// 22 = personal pronoun (his, her, my, your, our, mine, yours, hers, himself, itself, me, it, ...)
	POS_QL,				// 23 = qualifier (very, *ly, enough, indeed, ...)
	POS_RB,				// 24 = adverb (*lly, then, here, up, down, ...)
	POS_TO,				// 25 = infinitive marker to (to)
	POS_UH,				// 26 = interjection, exclamation (well, gosh, hello, damnit)
	POS_VB,				// 27 = verb
	POS_WD,				// 28 = wh-determiner (what, which)
	POS_WP,				// 29 = wh-pronoun (who, whose)
	POS_WQ,				// 30 = wh-qualifier (how)
	POS_WR				// 31 = wh-adverb (why, when, where)
} POS_TAG;
I may need to adjust this set (or perhaps even go up to a 64-tag set) in the future,
depending on what the following steps in my natural language processing system require.
I also skipped all the proper nouns from the Brown corpus, as I don't think I will need the
thousands of names of different persons in my project. I can add the names of those persons
I want Piro2 to recognize later on, or perhaps I can just consider all unknown words as
names.
Here below is a test run of my POS tagger test program. All the float numbers are logarithmic probabilities, meaning that the numbers are negative and a number closest to zero has the highest probability. I gave the program as input a sentence "One tries to be number one", in which the word "one" has two different part-of-speech senses, and the algorithm tries to figure out which POS tag to use for each occurence of the words.
Enter a sentence: one tries to be number one
one: (state 1934)
- pos='PN' (-1.566224)
- pos='CD' (-1.830119)
- pos='DT' (-8.885441)
tries: (state 62509)
- pos='NN' (-10.729193)
- pos='VB' (-9.580118)
to: (state 1592)
- pos='IN' (-2.397691)
- pos='TO' (-0.000067)
- pos='NP' (-10.672577)
- pos='QL' (-9.105979)
be: (state 1728)
- pos='BE' (-1.777937)
- pos='UH' (-6.459905)
number: (state 57010)
- pos='VB' (-10.966413)
- pos='NN' (-6.185898)
one: (state 1934)
- pos='PN' (-1.566224)
- pos='CD' (-1.830119)
- pos='DT' (-8.885441)
As shown above, first the program splits the input into words, and displays the word-specific probabilities of each part-of-speech tag this word may have. The state numbers are just the state indices where that word was found in my state machine. For example the word "one" has the highest probability to be a nominal pronoun, followed by it being a number, and somewhat less likely it can also be a determiner. The word "to" is very likely to be a "to" (not surprisingly), but it can also be a preposition or very unlikely a proper noun or a qualifier.
state=1934, tag=(-, -, PN), prob=-9.313138
state=1934, tag=(-, -, CD), prob=-7.724708
state=1934, tag=(-, -, DT), prob=-14.944350
trellisIdx=2, maxTrellisIdx=5
At this point the program has determined the probabilities of the first word, combining the word-specific statistics with the unigram/bigram/trigram statistics of how often a certain part-of-speech tag occurs at the start of a sentence. It has determined that it is more likely for "One" to be a number (CD) in the beginning of a sentence than it being a nominal pronoun. The trellisIdx and maxTrellisIdx shows the indices into my Viterbi backtracking table (which used a Trellis graph in the Jitar source code), meaning that these three possibilities were stored into the table at indices 2, 3 and 4, with 5 being the next free slot.
state=62509, tag=(-, PN, NN), prob=-23.179093
state=62509, tag=(-, CD, NN), prob=-20.426327
state=62509, tag=(-, DT, NN), prob=-27.459614
state=62509, tag=(-, PN, VB), prob=-21.796469
state=62509, tag=(-, CD, VB), prob=-20.997091
state=62509, tag=(-, DT, VB), prob=-27.983409
trellisIdx=5, maxTrellisIdx=7
Now the algorithm has two words to consider, and it still thinks it is most likely that the first two words "one tries" are either a number followed by a noun (-20.426327), or a number followed by a verb (-20.997091). As the word at this step only has two options (NN and VB), it only needs two rows in my trellis table.
state=1592, tag=(PN, NN, IN), prob=-27.355856
state=1592, tag=(CD, NN, IN), prob=-24.269274
state=1592, tag=(DT, NN, IN), prob=-31.459615
state=1592, tag=(PN, VB, IN), prob=-25.857194
state=1592, tag=(CD, VB, IN), prob=-25.240208
state=1592, tag=(DT, VB, IN), prob=-32.071901
state=1592, tag=(PN, NN, TO), prob=-27.398057
state=1592, tag=(CD, NN, TO), prob=-24.746521
state=1592, tag=(DT, NN, TO), prob=-31.622469
state=1592, tag=(PN, VB, TO), prob=-24.751889
state=1592, tag=(CD, VB, TO), prob=-24.767633
state=1592, tag=(DT, VB, TO), prob=-31.372522
state=1592, tag=(PN, NN, NP), prob=-38.499803
state=1592, tag=(CD, NN, NP), prob=-35.250526
state=1592, tag=(DT, NN, NP), prob=-42.436136
state=1592, tag=(PN, VB, NP), prob=-36.604233
state=1592, tag=(CD, VB, NP), prob=-35.409567
state=1592, tag=(DT, VB, NP), prob=-42.602534
state=1592, tag=(PN, NN, QL), prob=-38.350755
state=1592, tag=(CD, NN, QL), prob=-35.062889
state=1592, tag=(DT, NN, QL), prob=-41.999801
state=1592, tag=(PN, VB, QL), prob=-35.377915
state=1592, tag=(CD, VB, QL), prob=-35.336524
state=1592, tag=(DT, VB, QL), prob=-41.675599
trellisIdx=7, maxTrellisIdx=11
After the third word there are 3*2*4 = 24 different possibilities for the pos tag triplets. Still the triplet (CD, NN, IN) seems most likely at probability -24.269274, followed closely by (CD, NN, TO), (PN, VB, TO) and (CD, VB, TO).
state=1728, tag=(NN, IN, BE), prob=-30.965440
state=1728, tag=(VB, IN, BE), prob=-31.896511
state=1728, tag=(NN, TO, BE), prob=-29.091759
state=1728, tag=(VB, TO, BE), prob=-28.742667
state=1728, tag=(NN, NP, BE), prob=-40.221588
state=1728, tag=(VB, NP, BE), prob=-40.852515
state=1728, tag=(NN, QL, BE), prob=-41.931153
state=1728, tag=(VB, QL, BE), prob=-42.204789
state=1728, tag=(NN, IN, UH), prob=-39.748493
state=1728, tag=(VB, IN, UH), prob=-40.800234
state=1728, tag=(NN, TO, UH), prob=-40.384019
state=1728, tag=(VB, TO, UH), prob=-40.389386
state=1728, tag=(NN, NP, UH), prob=-50.779598
state=1728, tag=(VB, NP, UH), prob=-50.938641
state=1728, tag=(NN, QL, UH), prob=-50.700387
state=1728, tag=(VB, QL, UH), prob=-50.974023
trellisIdx=11, maxTrellisIdx=13
Now things are getting interesting. Firstly, the Viterbi algorithm has begun limiting the number of tests we need to do (otherwise at this point we would need to perform 3*2*4*2 = 48 tests, while the Viterbi algorithm only considers the 3 last state combinations, needing only 16 different tests). Also, the algorithm has now found a pretty strong probablity of "tries to be" being (VB, TO, BE) with a probability of -28.742667. It could also be (NN, TO, BE), but pretty much all the other options are quite unlikely compared to these two options (with the remaining probabilities being between -30 and -51).
state=57010, tag=(IN, BE, VB), prob=-43.251477
state=57010, tag=(TO, BE, VB), prob=-40.739038
state=57010, tag=(NP, BE, VB), prob=-52.478635
state=57010, tag=(QL, BE, VB), prob=-53.850352
state=57010, tag=(IN, UH, VB), prob=-54.572356
state=57010, tag=(TO, UH, VB), prob=-55.207880
state=57010, tag=(NP, UH, VB), prob=-65.603461
state=57010, tag=(QL, UH, VB), prob=-65.524249
state=57010, tag=(IN, BE, NN), prob=-40.076890
state=57010, tag=(TO, BE, NN), prob=-37.830589
state=57010, tag=(NP, BE, NN), prob=-49.279665
state=57010, tag=(QL, BE, NN), prob=-51.266664
state=57010, tag=(IN, UH, NN), prob=-49.170348
state=57010, tag=(TO, UH, NN), prob=-49.805873
state=57010, tag=(NP, UH, NN), prob=-60.201453
state=57010, tag=(QL, UH, NN), prob=-60.122241
trellisIdx=13, maxTrellisIdx=15
The next word "number" could be a noun or a verb. The word itself has a higher probability for it being a noun, and this shows in the cumulative probabilities as well, with the trigram (TO, BE, NN) being the most likely by a big margin.
state=1934, tag=(BE, VB, PN), prob=-48.434080
state=1934, tag=(UH, VB, PN), prob=-62.623795
state=1934, tag=(BE, NN, PN), prob=-46.983825
state=1934, tag=(UH, NN, PN), prob=-58.323585
state=1934, tag=(BE, VB, CD), prob=-47.520047
state=1934, tag=(UH, VB, CD), prob=-61.694804
state=1934, tag=(BE, NN, CD), prob=-44.198992
state=1934, tag=(UH, NN, CD), prob=-56.446049
state=1934, tag=(BE, VB, DT), prob=-54.225788
state=1934, tag=(UH, VB, DT), prob=-68.472226
state=1934, tag=(BE, NN, DT), prob=-52.072790
state=1934, tag=(UH, NN, DT), prob=-63.932768
trellisIdx=15, maxTrellisIdx=18
The last word "one" is again interesting, as the word-specific probabilities prefer it to be a nominal pronoun, however combined with the trigram probabilities of the preceding words the algorithm has determined that it is most likely a number, as in (BE, NN, CD).
tail=16, tail.tag=8=CD
tail=14, tail.tag=17=NN
tail=11, tail.tag=6=BE
tail=8, tail.tag=25=TO
tail=6, tail.tag=27=VB
tail=2, tail.tag=21=PN
tail=1, tail.tag=0=-
Now the Viterbi algorithm backtracks along the path it followed to get to the most likely end state, and prints the resulting part-of-speech tags. Note that I haven't bothered to switch the order of the resulting tags, so that they are printed from the end of the sentence towards the start. The resulting tagged sentence would be the following:
one/PN tries/VB to/TO be/BE number/NN one/CD
Sphinxtest with a smaller dictionary
After I did those tests with the Brown corpus, I got the idea that it probably is pretty useless having the Sphinx code use a larger dictionary, if the next step part-of-speech tagging step does not then recognize all the words. So I added a code into my test program that reads the Sphinx dictionary file, and writes a file that only contains the words that are found also in the Brown corpus.
I also hacked the Sphinx dictword_t structure definition in the dict.h file to have some additional fields for my POS tagger to use. I thought that it would be silly to load the same dictionary items twice in memory, first for the Sphinx speech recognition and then for the POS tagger. When Sphinx has recognized a sentence, it could give the POS tags and probabilities directly to the POS tagger as input, in addition to the actual words. This is what the struct definition looks like now:
/**
    \struct dictword_t
    \brief a structure for one dictionary word.
*/
typedef struct {
    char      *word;		/**< Ascii word string */
    s3cipid_t *ciphone;		/**< Pronunciation */
    int32     pronlen;		/**< Pronunciation length */
    s3wid_t   alt;		/**< Next alternative pronunciation id, NOT_S3WID if none */
    s3wid_t   basewid;		/**< Base pronunciation id */
    /* --- Additions by PA below --- */
    char      postag[4];	/**< PA: part-of-speech information for the word, four most common POS tags */
    float     posprob[4];	/**< PA: part-of-speech probabilities for the four most common POS tags */
} dictword_t;
Since I also use pointers to this structure in my ASM code, I needed to adjust the code that uses the size of this structure. I created a macro to return the structure size, so that I only have one location in my ASM code where I need to make changes if/when I still change the structure size:
// The dictword_t size is defined in include/dict.h
.macro dictword_t_size rout rin
    lsl		\rout, \rin, #5						// out = in * 32
    add		\rout, \rout, \rin, lsl #3				// out = in * (32+8) = in * 40
.endm
This is what the Sphinx output displayed originally when loading the default english dictionary:
INFO: dict.c(320): Allocating 137526 * 20 bytes (2686 KiB) for word entries
INFO: dict.c(333): Reading main dictionary: /home/pi/piro2/pocketsphinx-5prealpha/model/en-us/cmudict-en-us.dict
INFO: dict.c(213): Allocated 1007 KiB for strings, 1662 KiB for phones
INFO: dict.c(336): 133425 words read
After my changes the log shows this:
INFO: dict.c(350): Allocating 36182 * 40 bytes (1413 KiB) for word entries
INFO: dict.c(363): Reading main dictionary: /home/pi/piro2/wordnet/piro2.dict
INFO: dict.c(243): Allocated 257 KiB for strings, 420 KiB for phones
INFO: dict.c(366): 32081 words read
So, the total memory consumption dropped quite a bit, even though the structure size got doubled. The dictionary should still contain the most common English words, and I can of course manually add some important words that the Brown corpus does not contain (like "Internet" or "Google" or "Wikipedia") into the dictionary that I use for Piro2.
I also decided to test whether this smaller dictionary affects the Sphinx recognition speed. I used the same test sentence as I have been using in my performance tests before, and got the following result:
  %   cumulative   self              self     total
 time   seconds   seconds    calls  ms/call  ms/call  name
 12.25      1.31     1.31                             prune_nonroot_chan
 10.10      2.39     1.08                             eval_cb
  9.64      3.42     1.03      595     1.73     2.37  ngram_fwdflat_search
  8.61      4.34     0.92                             hmm_vit_eval
  8.23      5.22     0.88                             lm3g_bg_score
  6.83      5.95     0.73                             ptm_mgau_senone_eval
  6.45      6.64     0.69                             acmod_activate_hmm
  3.70      7.04     0.40  3642700     0.00     0.00  ngram_model_set_score
  3.46      7.41     0.37      595     0.62     1.84  prune_channels
  3.09      7.74     0.33                             eval_topn
  2.34      7.99     0.25      595     0.42     1.22  last_phone_transition
  1.82      8.18     0.20  3642700     0.00     0.00  ngram_ng_score
	...
  0.00     10.69     0.00   554659     0.00     0.00  hash_table_lookup_int32
So, the total time dropped from over 13 seconds down to less than 11 seconds. This was nice, I am getting closer to my target of 7 seconds recognition time for this 7-second sentence.
Sentence parsing
I got my part-of-speech tagger working around the middle of last week, so after that I have been studying the next step, actual sentence parsing. Again, there are various toolkits that have this as part of their tools, but I was looking for something simple and stand-alone that I could use for my purpose. I have been reading about the OpenCog foundation publications and various readmes for their routines, and had noticed that they use something called link-grammar for their natural language parsing. However, this seemed overly complicated for my needs.
For a while I wondered whether I could build a simple BNF grammar for English, and use that with the Lemon context-free grammar parser that I am familiar with. I found a StackExchange post about this, but it seems that this is not easy, and it would probably not be all that useful either.
However, this Friday I found the original link-parser version 4.1b, which is much less complex, so I began studying that. It states (on the Abisource pages) that it has difficulty with speech-to-text input, and it comes with it's own dictionary. Both of these are something that I would like to change, so I began thinking that perhaps I could again just use the ideas in this system, and build a version that would use the POS tags from my tagger, instead of the original words, when parsing the sentences. Also, the fact that link-grammar is not well suited to speech-to-text is mostly caused by it trying to find grammatically correct sentences (which is not what I need). In my usage scenario it is irrelevant whether the sentence is grammatically correct, I just need to have some idea as to how the words are linked together.
First I need to learn the different connector types that link-grammar uses to link the words together. Then I need to study the different classes of words it has in it's dictionary, and how well these match with my 32 POS tags. If needed, I could increase my tag list to 64. I also began thinking that it might be interesting trying to integrate my POS tagger and link-grammar further, so that also the POS tagger could use some information from link-grammar when it generates the POS tags. If a word is about as likely to be one of two POS tags, but only one of those tags is grammatically correct in that part of the sentence according to link-grammar, the POS tagger should use the tag that is grammatically correct. I am also thinking that integrating both the POS tagger and link-grammar directly into Sphinx could be very useful, so that if the speech-to-text stage has trouble deciding between two words that sound about the same, it could choose the word that is both in the part-of-speech sense and grammatically more likely. I have not studied the Sphinx system quite enough to be able to implement something like this yet, but at least integrating the POS tagger with link-grammar seems doable.
I will probably spend the next couple of weeks working on link-grammar and related routines. I received the longer wires last week so I could also re-assemble the head and connect all the wires, but I am currently more interested in the software side of things. I'll see whether I get the wiring done as well during my Christmas vacation, though.
Dec 4th, 2016 - Internal frame modeled and printed
Yesterday I finished modeling the internal frame that holds the Raspberry Pi 3 and the speaker, and also the neck and arm servos. I had started modeling this already back in September, and at that time I decided to have the Raspberry Pi standing at 23 degree angle (or 67 degrees from horizontal) inside the main torso of my robot. This is so that I could use the shortest wires possible when connecting the devices inside the head to the computer. This is especially important with the camera cable, which is not very long.
I have had trouble figuring out how I could print this complex part. Yesterday I decided to split it into two parts, so that I could perhaps print the upper part upside down, and the lower part (where the Raspberry Pi attaches to) flat on it's back. This still causes some areas of the model to hang in the air when printing them, so I may need to still change these models somewhat. But I hope at least in principle this setup would work.
I made some finishing touches on the models and then managed to have my 3D printer start printing the top part of the frame at around 10am yesterday (Saturday). It took a total of 7 hours and 30 minutes (and 3 seconds) to print, so it was the most time-consuming thing I have printed so far by quite a big margin. After that part got printed, I started the print of the lower part that holds the Raspberry Pi. That part took 3 hours 56 minutes to print, and got finished just before 10pm Saturday evening.
Today morning I then cleaned up the printed frame parts and joined them together with the earlier printed yellow speaker base part. I decided not to re-print that speaker base at this time, as I will need to figure out how to attach the torso cover into this frame, and I will probably need to model some attachment points for the cover. Thus it makse more sense to print this part only after I have modeled the needed changes.
Next, I attached the neck servo, and realised that it is pretty much impossible to screw the front screw in while while the head is attached. So, I need to disassemble the head and remove the servo arm from the neck servo before I can attach it properly to the main body frame. The neck servo is now attached with only the back screw. I then attached the Raspberry Pi 3 to the frame, and checked that the camera cable is long enough for all the needed head movement. However, the short wire from the MPU6050 is indeed too short, so I have to replace it with a longer wire. This too requires me to disassemble the head, so I decided to do that only after I receive the longer wires that I ordered from DealExtreme a couple of days ago. I purchased two sets of 40 wires, one set has 20cm long wires and the other set 30cm long wires. These should be sufficient for all my current and future needs, including the arm and hand servos.
Now that I have assembled the robot so far that the head can move and all important parts can be connected to the Raspberry Pi, I think it is time to shift my focus to software for a while. I just downloaded WordNet and took a quick look at it's database files (which are plain ASCII text files). My plan is to convert these ASCII database files to a state machine for quick lookup in the Piro2 code, so I will start by studying the files and thinking about the data structures I would need.
Nov 29th, 2016 - Build video for the Piro2 head
I had recorded some video when I assembled all the parts I had printed for the head of my robot. I spent yesterday editing this video, and today got it published on my YouTube channel. Perhaps you don't find this all that interesting, but I thought that if there is interest I could eventually release the 3D part models, so that you can build your own robot head for Raspberry Pi camera and the ultrasonic sensor. If I decide to do that, it might be useful for others to see how I joined the parts together.
Nov 26th, 2016 - Head of my Piro2 robot modeled, printed and assembled!
For the past couple of weeks I have been busy modeling all the parts I need to 3D-print for the head of my robot. I decided to first have a separate faceplate where I can attach the Raspberry Pi camera (that sees through the mouth opening) and the ultrasonic sensor (as the eyes). Then I needed to have some internal structure, which I modeled in two parts, where I can attach all the electronics, and then finally two outer shell parts for the left and right side of the head. This way I did not need to have any support material when printing the parts.
After I got the parts modeled last week, I have been printing them. Each part took about two hours to print, some of them were somewhast faster and some somewhat slower. I got the last part printed early morning today (Saturday), so I was then able to start assembling the robot head. The head ended up looking pretty interesting, here are a couple of pictures I took of the assembled head. It is just sitting on the original internal structure part I printed, which I had to remodel and print as I had some slight measurement errors in that original part. Next step is to continue with the torso modeling and then printing.
I also plan to add some sort of modeled hair to my robot, which is why there are those intrusions near the temples of the robot head. This is simply for cosmetics, so I will probably work on the torso before such parts that only server a cosmetic function.

Nov 17th, 2016 - Servos and M2 screws have arrived
The servos (which I ordered on the 2nd of this month) arrived today, and the M2 screw set that I ordered on the 26th of last month arrived two days ago. So now I am not missing any hardware to start building my robot, I just need to finish modeling and then printing the parts.
Nov 8th, 2016 - Samson Go microphone disassembly
Today I decided to disassemble my Samson Go microphone. I have tried to model my robot head so that I could use the microphone as is, but I just can't get it to fit in any useful way. I decided to disassemble it, and see if I could fit it better that way. I found a YouTube video that shows how to disassemble it, below it is in case you are interested in the same thing. That video has narration in some unfamiliar (to me) language, but just following the video itself gives quite a clear picture of how to disassemble the microphone.
Nov 7th, 2016 - Servo bracket for Piro2 neck printed
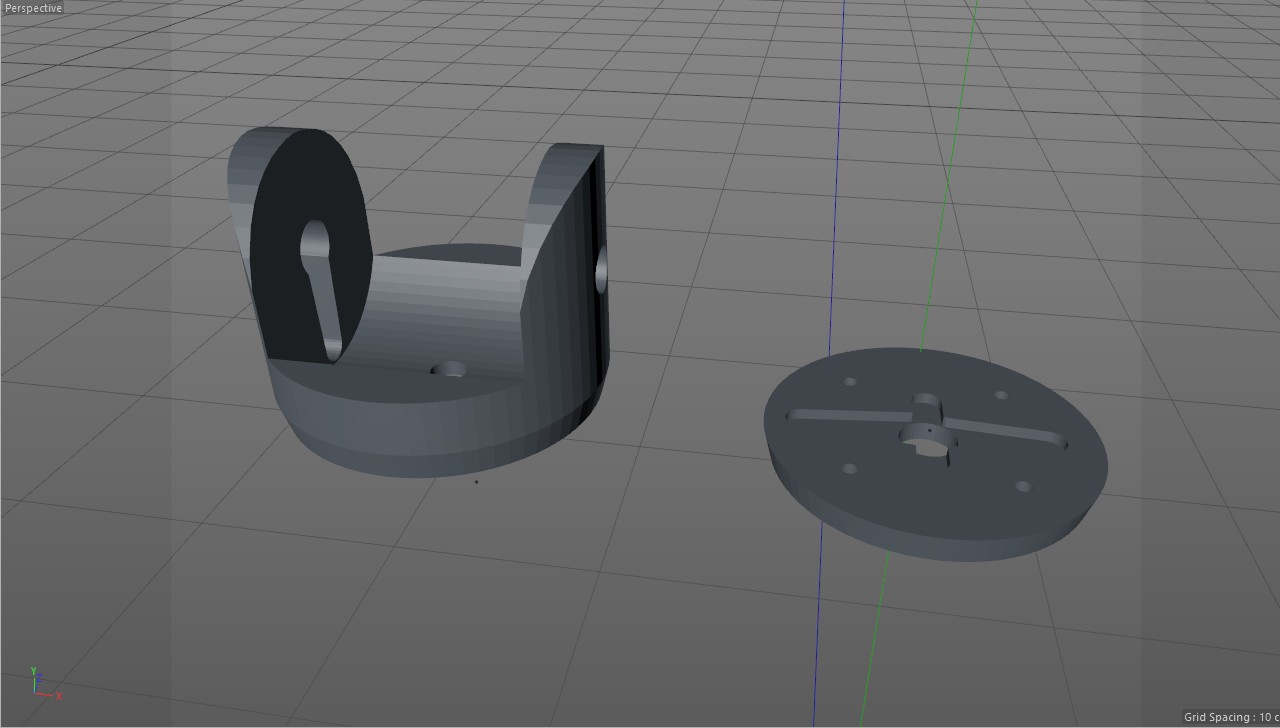
The next object I printed was the servo bracket that connects both servos that move the head of my robot. I decided to have the parts contain holes where I can use the original servo arms that came with the servos, so that I can easily attach the servos to these printed parts. The large cross-shaped servo arm is sandwiched between these printed parts. I had to print these parts twice, as I had not counted for the parts shrinking slightly after printing, so the first prints had the holes slightly too small.
Nov 5th, 2016 - Some software links
I have been thinking about the software side for my robot, as I want it to behave more intelligently than my original robot. I ran across some interesting links that will most likely have useful algorithms and data for my use. I am currently especially looking into Natural Language Processing, so that my robot would actually understand what I say to it, not just listen to some specific commands.
- WordNet seems to be a very integral part of any natural language processing, so I will most likely need to integrate that in some way to my robot.
- Stanford CoreNLP has a suite of NLP tools, but sadly it is coded in Java. The algorithms will probably still be useful for my needs.
- If I go towards the neural network route, SqueezeNet seems to be quite an efficient neural network implementation.
- Citar is a C++ part-of-speech tagger using Hidden Markov Models, so it might be useful for my needs as well.
Nov 2nd, 2016 - Ordered 6 more servos
Today I decided to order another set of 6 servos from DealExtreme. With my first set of 6 servos I could have two servos for each arm (as I need two servos for the head), which is not enough degrees of freedom for anything useful. Now that I have 12 servos I should be able to have the arms and hands of the robot to have as complex mechanisms as I want.
Oct 30th, 2016 - First Piro2 test part printed
After I got the spool holder printed, it was time to start printing some test parts for Piro2. I had designed the size of my robot so, that the HC-SR04 ultrasonic sensor would work as the eyes for the robot. I used my male pilot mesh from my Snow Fall animation project for all the measurements and proportions of the robot. I had calculated that if the head size is suitable for the ultrasonic sensor, the main torso has enough room to fit the Raspberry Pi 3 (on the back) and the small speaker I had purchased on the front.

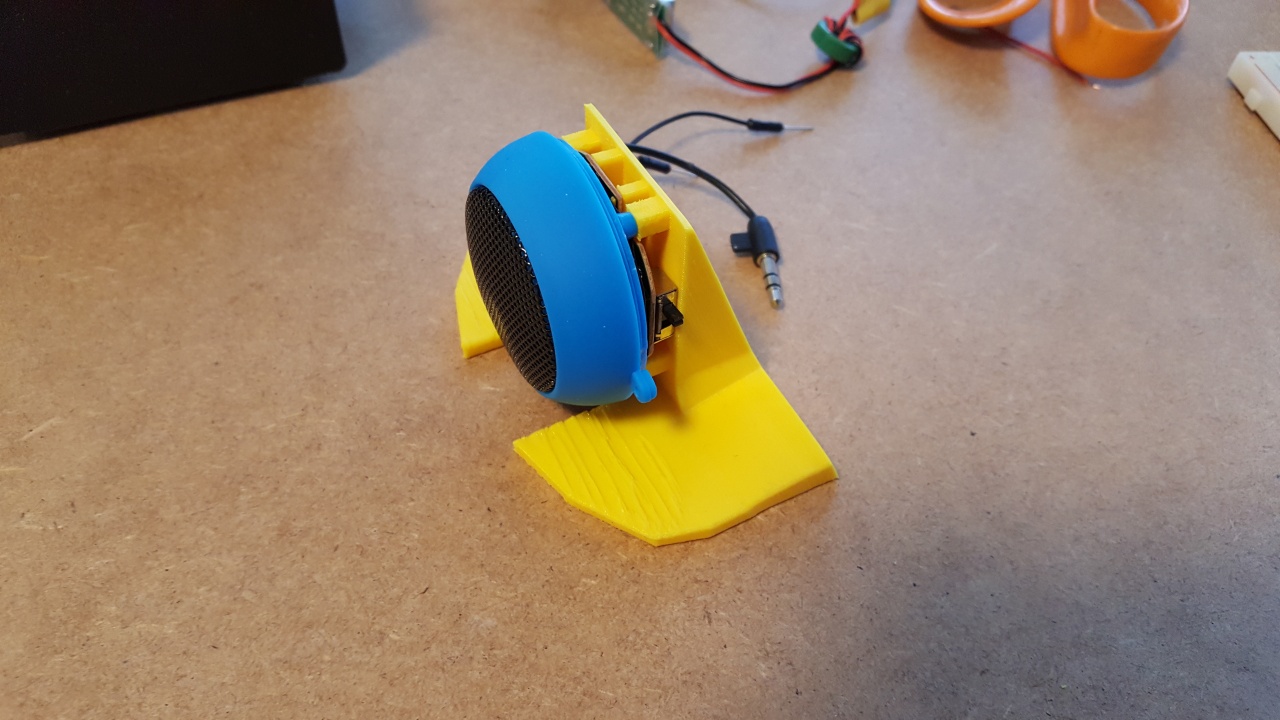
I had modeled some structures that would have attachment points for the speaker on the front and for Raspberry Pi 3 on the back. I decided to split these into several parts and add some screw holes to hold those parts together. Now I was ready to print the first part, for the speaker holder. I had disassembled the speaker I ordered from DealExtreme, and measured the screw holes I will need to be able to attach it. I also removed the small Li-Ion battery it had. The main circuit board it had did not have any screw holes, but it had four small 1 by 2 mm holes where the original case had held it, so I decided to model these small tabs as well. I was not sure how well those will be printed, but that is what this test print was all about.

The end result was actually pretty good. I printed this part with the back side (instead of the bottom) towards the print bed, so that I did not need to have any support material. I guess I used a bit too high temperature or printed the upper parts too fast, as there are some uneven melted-looking areas in the print. However most of the print turned out fine, and what was most important, all the small tabs and screw holes were in the correct position so I was able to attach the speaker into this part without trouble. The only problem is that I was still using the yellow filament, so I will still need to eventually print this part again using the black filament.
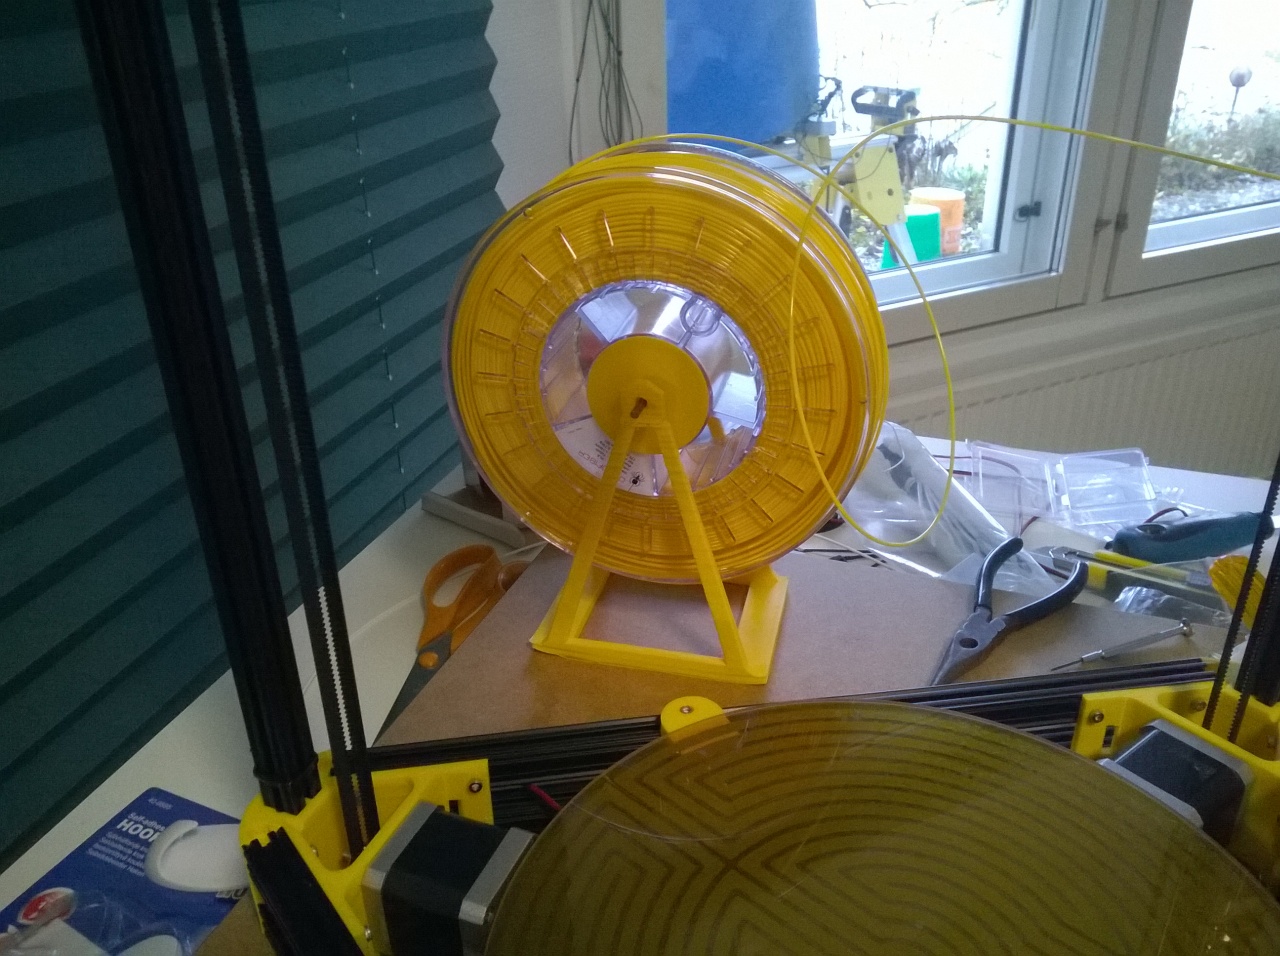
Oct 29th, 2016 - Spool holder printed
Today I got the spool holder printed. It did not work all that well, the part began to warp and eventually got completely loose from the build plate. I managed to print it all the way, but I had to hold the base in place. I also noticed that such tall and thin legs do not get printed very well, as they bend when a new layer gets printed so the print quality suffers quite a bit. But at least I learn something new every time I print stuff, so perhaps eventually I manage to design and print parts that succeed on the first try. :)
Oct 26th, 2016 - Ordered M2 nuts and bolts
Since I decided to use PLA in my robot, I needed a way to attach those parts to each other. With ABS I think I could have used acetone to sort of weld the parts together, but that does not work with PLA. Thus, I decided to order some small M2 nuts and bolts. I tried to find some locally, but in the end had to again order stuff from DealExtreme in China. I ordered the following products:
- 2mm M2x10 Stainless Steel Cross Round Head Screw (100 pieces)
- 2mm M2x6 Stainless Steel Flat-Head Screw Bolt (100 pieces)
- M2 Carbon Steel Hexagon Screw Nut (100 pieces) (I only got 100 nuts for 200 bolts, as I plan to screw most of those bolts to plastic without needing a nut.)
- I also added a Screw Nut Kit for Raspberry Pi, though I am not sure if I will actually need that. But I will probably figure out some use for that in any case.
Oct 24th, 2016 - KISSlicer settings adjusted
Today I worked on the settings in the slicer, trying to get my prints to work better. I also realised that for some reason the slicer code heats the bed up to 60 degrees for the first layer, but after that turns the bed heating completely off, so that when printing any larger parts they tend to pop off the print bed before the print is finished. This is what I changed:
- I changed the Printer/Hardware setting Loop / Solid Infill Overlap from the original 0.85 to 0.97. This should help with my prints having some gaps between the outer casing and the infill.
- I also changed the Style / Infill Extrusion Width from 0.35 to full 0.40.
- I changed the bed temperature from 60 degrees to 70 degrees. This should help the parts stick to the print bed better.
- I was not sure why the GCode turned the bead heating off after the first layer. The only place where I found a command M140 S0 (which I believe does the bed heat off turning) was in the "Cool & Retire Old Ext" setting. I only have one extruder, so I don't see why it should run that code. Anyways, I commented that out, and instead put the M140 S0 command to the Postfix area. This seemed to help keeping the bed at the full 70 degrees temperature throughout the print.
Oct 23rd, 2016 - Ordered some more filaments
I decided to order a couple more filament reels. I got a yellow PLA reel, for printing a spool holder and possibly also other additinal stuff for my 3D printer (which has yellow printed parts), and a black PLA reel. I have decided that I will probably use PLA instead of ABS for my robot, but I still want to print the internal structure parts in black, and the case parts in white.
Oct 22nd, 2016 - 3D printer build finished!
Okay, today I finally got the 3D printer built, and was able to print the first test object. I looked at Thingiverse for something simple to print and test my printer, and found a 5mm calibration test cube. Here below is a video clip of my printing that object. I was quite surprised how well it worked even on the first go. Looks like I did not make any major mistakes when building my printer. I am very much looking forward to printing some actual parts for my robot! However, before that I need to print a holder for the filament reel, currently it just lies on the table and I have to manually rotate it when needed. Not very practical.
Oct 9th, 2016 - 3D printer build continues
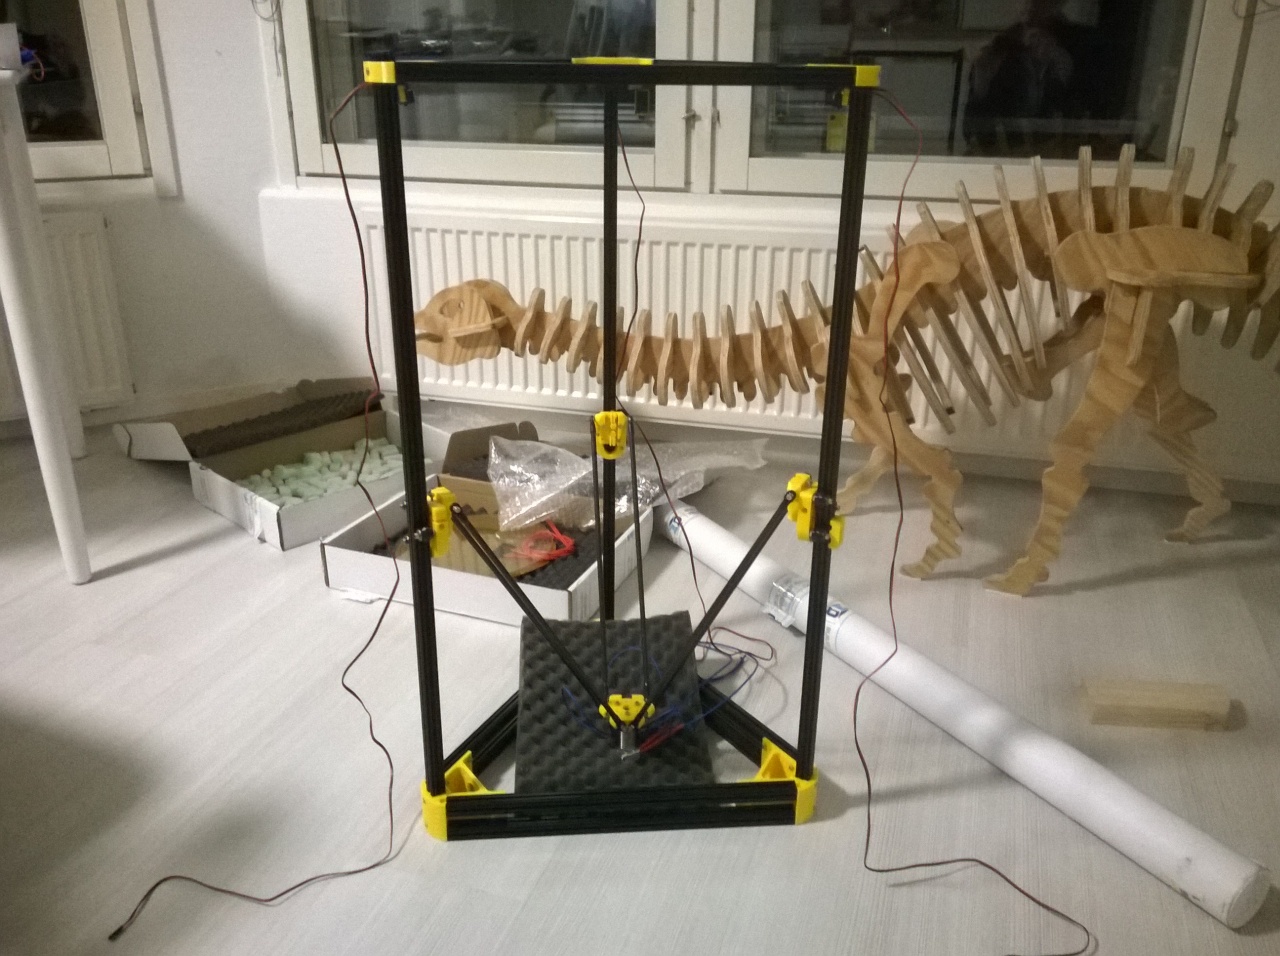
I have been building the printer for a couple of days now, it is starting to take shape. The main frame has been built. Here in the background is the decorative plywood dinosaur model I built last summer, which I mentioned on the July 22nd blog post.
Oct 7th, 2016 - Work started on building the 3D printer
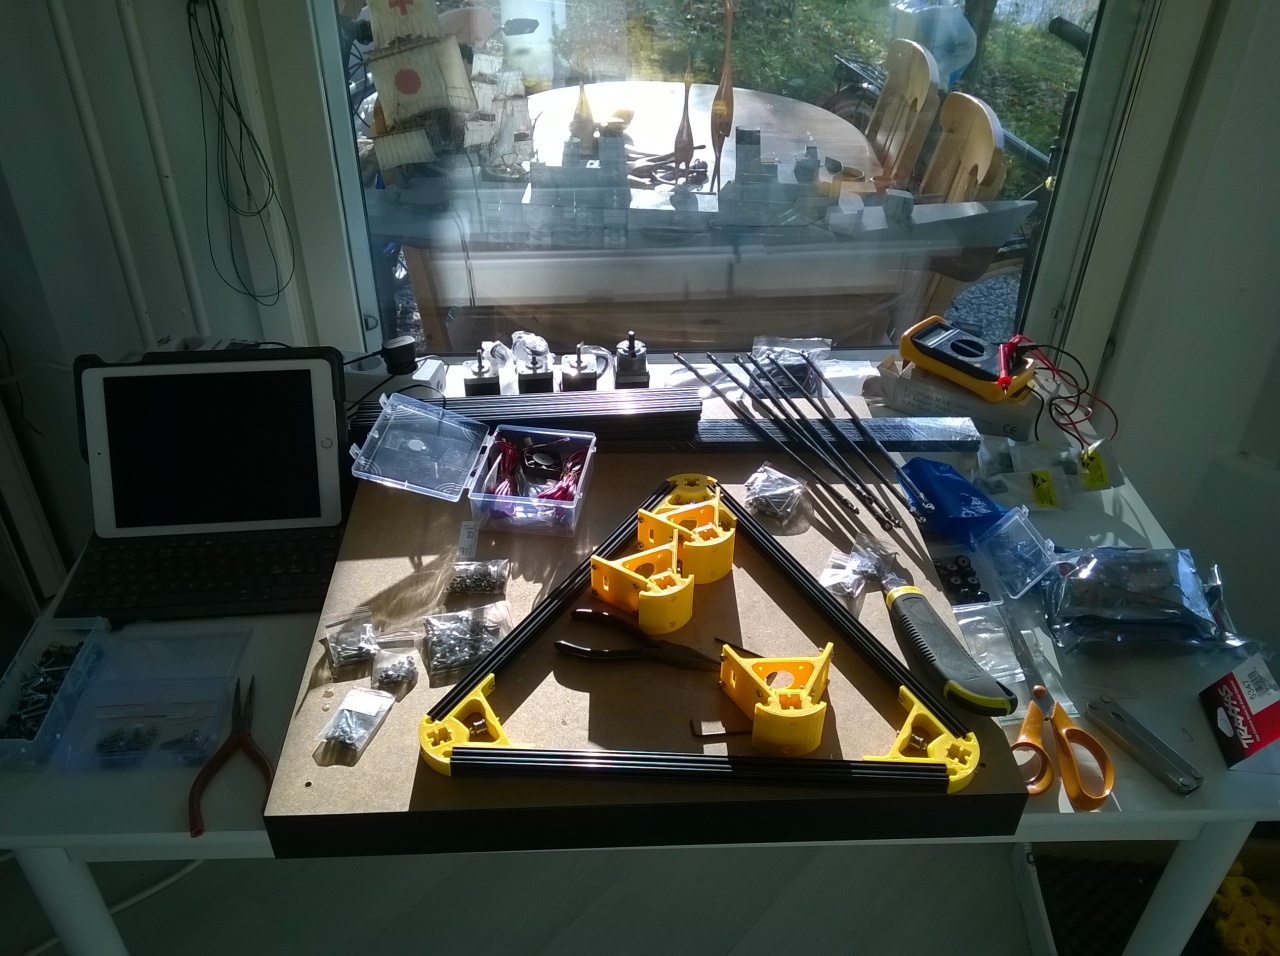
Yesterday I was finally able to start working on building the 3D printer. The GT2 pulleys that the printer uses were on back order, so it took a while before builda3dprinter.eu was able to send my kit. I have been working on the 3D models until now, so it is good to finally work on the printer and then eventually get some test prints done. This is what my desk now looks like, with most of the printer parts on it. Yesterday I glued the rod ends to the carbon fibre rods, and the next step is to start building the frame.
Sep 4th, 2016 - Cinema 4D models for 3D printing
Today I starfted working on some 3D models for 3D printing for Piro2. I plan to use my Cinema 4D software, which I originally purchased back in 2003 for a animated 3D movie Snow Fall I was working on back then. In November of 2014 I upgraded my Cinema 4D to the then latest version 16 (from my original version 8), as I continued working on Snow Fall for a little while back then. Anyways, I decided to look into how to model 3D objects using Cinema 4D for 3D printing, and found some tips from Nick Lievendag. It looks like there is nothing very difficult with the modeling, just make sure I use the correct scaling and make the objects properly hollow.
Sep 3rd, 2016 - Ordered sensors and voltage converters, optimization work continues
Today I ordered some stuff for my new robot, again from DealExtreme in China.
- HC-SR04 Ultrasonic Sensor, one of which I already had in my original Piro robot, but I had not used it in that robot. I decided to purchase a new one and this time I plan to actually use it in my new robot.
- MPU6050 3-Axis Acceleration Gyroscope, again similar to what I used in the original Piro. I am not sure if I actually need it, but decided to order one as it is quite cheap.
- Two Hobbywing 5V/6V 3A UBECs, which were the most reliable voltage converters I used in my original Piro. I don't know yet what sort of a power source I will use in Piro2, but thought that I will probably need one voltage converter for Raspberry Pi 3, and at least one for everything else.
- USB chanrging cable for connecting the UBEC to the Raspberry Pi 3. I will need to cut the cable and solder it to the voltage convertor leads.
I also continued my ASM optimization work. I converted the ptm_mgau_senone_eval routine to ASM. Sadly, this did not bring any noticeable speedup:
  %   cumulative   self              self     total
 time   seconds   seconds    calls   s/call   s/call  name
 12.85      1.76     1.76                             prune_nonroot_chan
  9.05      3.00     1.24                             hmm_vit_eval
  8.18      4.12     1.12                             acmod_activate_hmm
  8.10      5.23     1.11                             eval_cb
  7.88      6.31     1.08                             lm3g_bg_score
  7.74      7.37     1.06      595     0.00     0.00  ngram_fwdflat_search
  5.55      8.13     0.76                             ptm_mgau_senone_eval
  3.94      8.67     0.54  5317173     0.00     0.00  ngram_model_set_score
  2.92      9.07     0.40      595     0.00     0.00  last_phone_transition
  2.48      9.41     0.34  5317173     0.00     0.00  ngram_ng_score
  2.48      9.75     0.34      595     0.00     0.00  prune_channels
  2.48     10.09     0.34                             eval_topn
  2.34     10.41     0.32        3     0.11     0.14  ngram_search_lattice
  1.68     10.64     0.23  5060987     0.00     0.00  ngram_search_exit_score
  1.46     10.84     0.20  5314873     0.00     0.00  lm3g_tg_score
  1.31     11.02     0.18                             find_tg
	...
  0.00     13.70     0.00  1032470     0.00     0.00  ckd_free
Sep 2nd, 2016 - Ordered a Kossel XL 3D printer kit
Today I ordered a Kossel XL 3D printer kit from builda3dprinter.eu. I have been thinking about getting a 3D printer for many months now, even before I started working on my new robot. It just has been very difficult to decide what sort of a printer should I get, and whether to get a ready built one or a kit. I found the YouTube channel of builda3dprinter.eu and checked some of the build tutorials, which convinced me to purchase this kit. I decided to get the heated bed as well, as I think I will use ABS for internal structure and PLA for the case for the robot.
I also ordered a reel of black ABS and a reel of white PLA from a local web store that specializes in 3D printing, 3D-tulostus.fi. I did not find any markedly lower prices from foreign web stores, so I decided to use a local store. The filaments should arrive pretty fast, as they seem to have everything in stock.
Aug 28th, 2016 - More ASM optimization work
Yesterday and today i continued my ASM optimization work. I did the following optimizations:
- Converted find_tg to ASM. It was very similar to find_bg, just the structure size differs.
- Converted lm3g_bg_score to ASM, and inlinded the find_bg routine that it calls into the routine. Thus find_bg will not show on profiling results any more.
- Optimized the ptm_mgau_senone_eval C code (removed some asserts etc).
  %   cumulative   self              self     total
 time   seconds   seconds    calls   s/call   s/call  name
 13.64      1.79     1.79                             prune_nonroot_chan
  9.15      2.99     1.20                             hmm_vit_eval
  8.99      4.17     1.18      595     0.00     0.00  ngram_fwdflat_search
  7.62      5.17     1.00                             eval_cb
  7.32      6.13     0.96                             lm3g_bg_score
  5.87      6.90     0.77     1785     0.00     0.00  ptm_mgau_senone_eval
  5.56      7.63     0.73                             acmod_activate_hmm
  3.96      8.15     0.52  5317173     0.00     0.00  ngram_model_set_score
  3.58      8.62     0.47      595     0.00     0.00  last_phone_transition
  2.90      9.00     0.38      595     0.00     0.00  prune_channels
  2.82      9.37     0.37                             eval_topn
  2.59      9.71     0.34        3     0.11     0.15  ngram_search_lattice
  2.44     10.03     0.32  5317173     0.00     0.00  ngram_ng_score
  2.13     10.31     0.28  5060987     0.00     0.00  ngram_search_exit_score
  1.52     10.51     0.20                             find_tg
	...
  0.00     13.12     0.00  1032470     0.00     0.00  ckd_free
So, I am closing on the 13 seconds total time.
Aug 26th, 2016 - prune_root_chan converted to ASM
Today i continued my optimization work, this time I converted the prune_root_chan routine to ASM. This resulted in the following profiling run:
  %   cumulative   self              self     total
 time   seconds   seconds    calls   s/call   s/call  name
 14.28      1.94     1.94                             prune_nonroot_chan
  9.20      3.19     1.25      595     0.00     0.00  ngram_fwdflat_search
  8.61      4.36     1.17     1785     0.00     0.00  ptm_mgau_senone_eval
  8.09      5.46     1.10                             eval_cb_asm
  8.02      6.55     1.09                             hmm_vit_eval
  5.89      7.35     0.80                             acmod_activate_hmm
  3.83      7.87     0.52      595     0.00     0.00  prune_channels
  3.61      8.36     0.49  5316726     0.00     0.00  ngram_model_set_score
  3.02      8.77     0.41      595     0.00     0.00  last_phone_transition
  2.87      9.16     0.39                             eval_topn_asm
	...
  0.00     13.59     0.00   533886     0.00     0.00  __ckd_malloc__
So, for the first time I got below 14 seconds total time, which was nice. Of course the time varies a bit between test runs, so I should not look too closely at single test run results.
Aug 22nd, 2016 - Acoustic model adapted to Samson Go microphone
Today I adapted the Sphinx acoustic model to my voice using the Samson Go microphone. I am not sure how much the microphone affects the acoustic model, but decided to do this in any case. I also wrote down the required steps when adapting the acoustic model, for future reference. I will perhaps redo this adaptation after I know what sort of commands or sentences I will speak to my robot in the future.
- Follow the tutorial at cmusphinx.
- Use the arecord command to record all the audio into a single file.
arecord -f S16_LE -r 16000 -c 2 -D hw:1,0 adapt.wav
- Use Audacity to cut the recorded stereo audio file to separate mono WAV files, one for each adaptation sentence.
- Create the .mfc feature files with the sphinx_fe command.
sphinx_fe -argfile en-us/feat.params -samprate 16000 -c arctic20.fileids -di . -do . -ei wav -eo mfc -mswav yes
- Collect statistics with the bw command.
./bw -hmmdir en-us -moddeffn en-us/mdef -ts2cbfn .ptm. -feat 1s_c_d_dd -svspec 0-12/13-25/26-38 -cmn current -agc none -dictfn cmudict-en-us.dict -ctlfn arctic20.fileids -lsnfn arctic20.transcription -accumdir .
- Copy the original model files to the en-us-adapt directory.
cp -a en-us en-us-adapt
- Do the actual adaptation with the map_adapt command.
./map_adapt -moddeffn en-us/mdef -ts2cbfn .ptm. -meanfn en-us/means -varfn en-us/variances -mixwfn en-us/mixture_weights -tmatfn en-us/transition_matrices -accumdir . -mapmeanfn en-us-adapt/means -mapvarfn en-us-adapt/variances -mapmixwfn en-us-adapt/mixture_weights -maptmatfn en-us-adapt/transition_matrices
- Change the default model directory in sphinxtest/continuous.c.
#define MODELDIR "/home/pi/piro2/sphinxadapt"
Aug 21st, 2016 - New test WAV for sphinxtest profiling, find_bg ASM routine
Today I recorded a new test WAV file using the Smason Go microphone for my future sphinxtest profiling tests. The audio file is slightly over 7 seconds long, so that gives me a target for my sphinxtest optimization work. If I get sphinxtest to run in 7 seconds or less when performing the speech recognition, it will run in real time on Piro2. I will dedicate a separate thread (which should run on it's own CPU core) for speech recognition in the piro2 software. The first profiling results with the new test wav were like this:
  %   cumulative   self              self     total
 time   seconds   seconds    calls   s/call   s/call  name
 12.43      1.98     1.98                             prune_nonroot_chan
  8.73      3.37     1.39                             hmm_vit_eval
  8.29      4.69     1.32     1785     0.00     0.00  ptm_mgau_senone_eval
  7.41      5.87     1.18      595     0.00     0.00  ngram_fwdflat_search
  7.34      7.04     1.17                             eval_cb_asm
  5.96      7.99     0.95  5368791     0.00     0.00  find_bg
  4.96      8.78     0.79                             acmod_activate_hmm
  4.39      9.48     0.70  5419868     0.00     0.00  ngram_model_set_score
  3.64     10.06     0.58      595     0.00     0.01  prune_channels
  3.45     10.61     0.55      595     0.00     0.00  prune_root_chan
  3.45     11.16     0.55      595     0.00     0.00  last_phone_transition
  2.39     11.54     0.38  5419868     0.00     0.00  ngram_ng_score
  2.26     11.90     0.36  5351994     0.00     0.00  lm3g_bg_score
  1.69     12.17     0.27  5417568     0.00     0.00  lm3g_tg_score
  1.57     12.42     0.25        3     0.08     0.14  ngram_search_lattice
  1.57     12.67     0.25                             eval_topn_asm
  1.38     12.89     0.22  5293970     0.00     0.00  find_tg
	...
  0.00     15.93     0.00  3134223     0.00     0.00  hmm_enter
So, the total time spent is currently 15.93 seconds, so i am still quite far from the 7 second goal. This 16 second time time includes the time it takes to load the language model and such, so the situation is not quite as bad, though.
Next, I converted find_bg to ASM, and got the total time to drop to around 15 seconds. For some reason the profiler did not count the new find_bg routine separately in the profiling results. The original find_bg used binary search to get close to the target range, and then sequential search to find the actual value. I decide to use binary search down to the actual value in my ASM code, as I don't think it is any slower than sequential search.
	//-----------------------------------------------------------------------------------
	//	int32 find_bg(bigram_t * bg, int32 n, int32 w)
	//	{
	//	    int32 i, b, e;
	//
	//	Registers:
	//		r0 	= i
	//		r1 	= n = length of the array = e
	//		r2 	= w = word to search for
	//		r3 	= *bg = start address of the array
	//		r12	= b = beginning of the segment
	//-----
find_bg:
	push		{lr}
	mov		r3, r0								// r3 = *bg
	mov		r12, #0
	add		r0, r12, r1
1:	asr		r0, r0, #1							// r0 = i = (b + e) >> 1
	lsl		lr, r0, #3							// Each bg element is 8 bytes
	ldrh		lr, [r3, lr]							// lr = bg[i].wid
	cmp		lr, r2								// 	if (bg[i].wid < w)
	addlt		r12, r0, #1							// 		b = i + 1;
	movgt		r1, r0								//	else if (bg[i].wid > w) e = i;
	popeq		{pc}								// else return i;
	//-----
	// Match not found yet, see if it makes sense to continue searching
	//-----
	subs		lr, r1, r12							// lr = e-b
	add		r0, r12, r1							// r0 = b + e
	bgt		1b
	//-----
	// Not found in the array.
	//-----
	mvn		r0, #0
	pop		{pc}
Aug 20th, 2016 - New stereo-to-mono NEON ASM routine
Today I continued working on the routines from the old Piro code. I implemented a quick and dirty NEON ASM routine that converts the stereo interleaved audio recorded from the microphone to mono audio data. For some reason I could not configure the ALSA routines so that it would record each of the stereo channels to separate buffers. Perhaps that feature is not supported or otherwise does not work with this microphone. I don't think that is a big issue, I can pretty easily just convert the audio data using this conversion routine.
//------------------------ stereo_to_mono -----------------------------------------------------
// void stereo_to_mono(void *target, void* source, int bytes)
//
// Input:
// 	r0 = target pointer (must be word-aligned!)
// 	r1 = source pointer (must be word-aligned!)
// 	r2 = number of bytes to WRITE (always writes at least 32 bytes!)
//
stereo_to_mono:
	vldmia		r1!, {s0-s15}
	vuzp.16		q0, q1
	vuzp.16		q2, q3
	vmov		q1, q2
	subs		r2, #8*4
	vstmia		r0!, {s0-s7}
	bgt		stereo_to_mono
	bx		lr
Aug 19th, 2016 - Work on Piro software continues
For the past couple of days I have been working on building the Piro opencv face recognition routines. I have not installed the OpenCV itself on my Raspberry Pi 3 yet, as I wanted to make my face recognition code to work without using any of the OpenCV libraries. This was a bit more work than I had though, as I had forgotten that the Haar Cascade XML file routines still relied heavily on the OpenCV libraries. I had to recode much of that to get rid of all the OpenCV dependencies, but finally managed to get the code to compile.
Aug 9th, 2016 - Samson Go USB microphone arrives
Today the new microphone arrived. I connected it to my Raspberry Pi 3, and tested it. For some reason it does not seem to support recording in mono, it always wants to record in stereo. This is a bit silly as it does not seem to have any stereo separation, so both the stereo channels have the same audio anyways. This is the arecord command I used to record a five second test clip:
arecord -f S16_LE -r 16000 -c 2 -d 5 -D hw:1,0 test.wavOther than the silly stereo issue, it seems to have very good audio quality, especially compared to my old cheap webcam microphones. No extra noise issues.
Aug 5th, 2016 - prune_nonroot_chan optimizing started
The slowest routine has been the prune_nonroot_chan, so I finally decided to tackle that one. It is a bit more complex routine than the ones I have optimized before, so I had been pushing back working on it.
I started by counting how often each of the major parts of the code gets called. You can see the original source code for the routine from Github, for example. The counts were:
- main for loop: 	2437487
- main if:		2207792
- nexthmm for-loop:	3033668
- hmm_enter:		 916639
- w loop:		1066161
- candp set:		 180996
- hmm_clear:		 164621
Those counts did not give any obvious speedup ideas to me, except that perhaps hmm_clear could be outside of the most common program flow path. I decided to convert the routine to ASM in any case, so that I can optimized the CPU register usage if nothing else. The first test with the new converted routine did not bring much of an improvement:
  %   cumulative   self              self     total
 time   seconds   seconds    calls   s/call   s/call  name
 12.05      1.31     1.31                             prune_nonroot_chan
  8.28      2.21     0.90                             hmm_vit_eval
  8.10      3.09     0.88  3961160     0.00     0.00  find_bg
  8.00      3.96     0.87      290     0.00     0.01  ngram_fwdflat_search
I then added some pld commands to preload data to cache, optimized some register loads, and finally created a separate code for when pls (phone loop search) pointer is null, so that it dows not need to be checked in the inner loops. This resulted in a somewhat faster code:
  %   cumulative   self              self     total
 time   seconds   seconds    calls   s/call   s/call  name
 10.48      1.10     1.10                             prune_nonroot_chan
  9.14      2.06     0.96  3961160     0.00     0.00  find_bg
  7.24      2.82     0.76      290     0.00     0.01  ngram_fwdflat_search
  6.95      3.55     0.73      870     0.00     0.00  ptm_mgau_senone_eval
  6.67      4.25     0.70                             hmm_vit_eval
July 29th, 2016 - pragma weak, acmod_activate_hmm converted to ASM
Only today I found out about the GCC "weak" pragma, which can be used to have the same symbol defined several times in the code. If there are several routines with the same name, the GCC linker uses the one that does not have a "weak" pragma defined. Thus, I can define the original C routines with #pragma weak acmod_activate_hmm or similar, so that I can then replace them with ASM routines as I implement them, without needing to rename my routines or the original routines to get the code to build. That was a useful find.
I also converted the acmod_activate_hmm routine to ASM, even though that one was rather simple, it just updates a bit vector. But since it is one of the five slowest routines at the moment, I decided to optimize it just for the sake of completeness. And to test the pragma weak feature. :)
  %   cumulative   self              self     total
 time   seconds   seconds    calls   s/call   s/call  name
 12.58      1.34     1.34      290     0.00     0.00  prune_nonroot_chan
  8.36      2.23     0.89  3961160     0.00     0.00  find_bg
  7.89      3.07     0.84                             hmm_vit_eval
  7.61      3.88     0.81      290     0.00     0.01  ngram_fwdflat_search
  6.76      4.60     0.72      870     0.00     0.00  ptm_mgau_senone_eval
  5.35      5.17     0.57                             acmod_activate_hmm
  5.26      5.73     0.56                             eval_cb_asm
  4.41      6.20     0.47  4058050     0.00     0.00  ngram_model_set_score
July 28th, 2016 - hmm_vit_eval converted to ASM
Okay, today I managed to convert the most important hmm_vit_eval_3st_lr code to ASM (with the name hmm_vit_eval_asm).
  %   cumulative   self              self     total
 time   seconds   seconds    calls   s/call   s/call  name
 11.76      1.30     1.30      290     0.00     0.00  prune_nonroot_chan
  8.14      2.20     0.90  3961160     0.00     0.00  find_bg
  7.51      3.03     0.83      290     0.00     0.01  ngram_fwdflat_search
  7.24      3.83     0.80  4474602     0.00     0.00  acmod_activate_hmm
  6.33      4.53     0.70      870     0.00     0.00  ptm_mgau_senone_eval
  6.06      5.20     0.67                             hmm_vit_eval_asm
  5.07      5.76     0.56                             eval_cb_asm
  3.85      6.19     0.43  4058050     0.00     0.00  ngram_model_set_score
  3.26      6.55     0.36  3950655     0.00     0.00  lm3g_bg_score
  3.08      6.89     0.34      290     0.00     0.00  prune_root_chan
  2.99      7.22     0.33      290     0.00     0.01  prune_channels
	...
  0.18     10.53     0.02   204677     0.00     0.00  hmm_vit_eval_3st_lr_mpx
	...
  0.00     11.05     0.00   204677     0.00     0.00  hmm_vit_eval
So, the time spent in hmm_vit_eval dropped from 9.48% down to 6.06% (or from 1.10 seconds down to 0.67 seconds). The remaining hmm_vit code paths only take 0.02 seconds of the total time, so those are not worth optimizing further.
July 26th, 2016 - Sphinxtest profiling on Raspberry Pi 3
Today I started profiling my sphinxtest program on my Raspberry Pi 3. The first run gave the following profiling result, which I used as the baseline for my code optimizations. I had already converted to ASM and also otherwise optimized the eval_cb_asm and eval_topn_asm routines when working on my original Piro robot, as I mentioned on my Piro blog post on August 8th, 2015, so almost a year ago.
  %   cumulative   self              self     total
 time   seconds   seconds    calls   s/call   s/call  name
 13.02      1.51     1.51      290     0.01     0.01  prune_nonroot_chan		(ngram_search_fwdtree.c)
  9.48      2.61     1.10  4474575     0.00     0.00  hmm_vit_eval			(hmm.c)
  6.64      3.38     0.77      290     0.00     0.01  ngram_fwdflat_search		(ngram_search_fwdflat.c)
  6.64      4.15     0.77  3961160     0.00     0.00  find_bg				(..\include\lm3g_templates.c)
  6.55      4.91     0.76  4474602     0.00     0.00  acmod_activate_hmm		(acmod.c)
  5.69      5.57     0.66      870     0.00     0.00  ptm_mgau_senone_eval
  4.22      6.06     0.49                             eval_cb_asm
  3.79      6.50     0.44      290     0.00     0.01  last_phone_transition
  3.19      6.87     0.37        2     0.19     0.24  ngram_search_lattice
  3.02      7.22     0.35  4058050     0.00     0.00  ngram_model_set_score
  2.33      7.49     0.27      290     0.00     0.01  prune_channels			(ngram_search_fwdtree.c)
  2.24      7.75     0.26  3950655     0.00     0.00  lm3g_bg_score
  2.07      7.99     0.24  3923995     0.00     0.00  find_tg
  1.98      8.22     0.23  4534111     0.00     0.00  ngram_search_exit_score
  1.81      8.43     0.21      290     0.00     0.00  prune_root_chan			(ngram_search_fwdtree.c)
  1.64      8.62     0.19  4055093     0.00     0.00  lm3g_tg_score
  1.64      8.81     0.19                             eval_topn_asm
  1.59      9.00     0.19  4058050     0.00     0.00  ngram_ng_score
  1.29      9.15     0.15  1319057     0.00     0.00  delete
  1.21      9.29     0.14      290     0.00     0.00  compute_sen_active		(ngram_search_fwdtree.c)
  1.21      9.43     0.14      290     0.00     0.00  prune_word_chan
After running those I decided that hmm_vit_eval would probably be a good candidate for optimizing and converting to ASM, as it gets called quite a few times. I noticed it had some static inline subroutines, so I ran another test with those subroutines made public so that the profiler could calculate their time as well.
  6.50      3.85     0.73  4269898     0.00     0.00  hmm_vit_eval_3st_lr
  2.76      7.79     0.31  4474575     0.00     0.00  hmm_vit_eval
  0.71      9.83     0.08   204677     0.00     0.00  hmm_vit_eval_3st_lr_mpx
It looks like hmm_vit_eval_3st_lr is the most important routine to optimize, and the mpx (multiplex) version the least important.
July 25th, 2016 - Samson Go USB Microphone ordered
After I adapted the acoustic model, I decided to look into what a good quality USB microphone would cost. Using a better quality microphone would probaly improve the speech recognition accuracy as well. I found some comparisons that mentioned the rather cheap Samson Go USB microphone to have a very good quality for the price, so I decided to purchase one from Thomann.
July 24th, 2016 - Adapting the Sphinx acoustic model
I had not bothered to adapt the original Sphinx acoustic model with my Piro robot, but I decided to look into adapting it now with Piro2, to hopefully improve the accuracy. I studied the adaptation tutorial and noticed that it is not actually all that difficult to do. At first I made the mistake of trying to use MLLR adaptation, until I read more carefully the tutorial and realized I need to use MAP adaptation with the model I used in my pocketsphinx tests.
After testing the adapted acoustic model I found it slightly more accurate, but there was not a dramatic improvement. It was probably not realistic to expect a major improvement, especially with my low quality microphones.
July 23rd, 2016 - CMU Sphinx install
I had not yet installed the CMU Sphinx speech recognition system on my new Raspberry Pi 3, so I decided to do that now. I wrote down the whole build command set for future reference.
sudo apt-get install bison
sudo apt-get install swig
sudo apt-get install python-dev

wget http://downloads.sourceforge.net/project/cmusphinx/sphinxbase/0.8/sphinxbase-0.8.tar.gz
tar -zxvf sphinxbase-0.8.tar.gz
cd ~/sphinxbase-0.8/
./configure --enable-fixed
make
sudo make install
wget http://downloads.sourceforge.net/project/cmusphinx/pocketsphinx/0.8/pocketsphinx-0.8.tar.gz
tar -zxvf pocketsphinx-0.8.tar.gz
cd ~/pocketsphinx-0.8/
./configure
make
sudo make install
After that I still needed to add
export LD_LIBRARY_PATH=/usr/local/libto the end of .bashrc for Sphinx to run. I then rebuilt my sphinxtest program that I used already with the original Piro when optimizing the speech recognition code.
July 22nd, 2016 - Ordered 6 servos for Piro2
My robot project has been on hold for almost a month now, as I have been working on a decorative dinosaur model for my new apartment. Now I have got that done, I was able to get back to working on piro2. First, I ordered some servos from DealExtreme in China. I was pretty sure I will need at least these six servos, two for moving the robot head, and at least two for each arm. I will probably still need more servos, but I am not sure how strong these small servos are so I might need to order some stronger servos for some other parts of the robot. I am also still not sure whether I will try to build legs for it or not.
June 27th, 2016 - Installing Soar on a Raspberry Pi
As my primary goal with my new robot is to study artificial intelligence and algorithms related to that, I have been searching for various software that might help me with that or implement some parts of what I aim to do. Today I ran across Soar, "a general cognitive architecture for developing systems that exhibit intelligent behavior". That sounds exactly what I need for piro2, so I downloaded the software and managed to install it.
For building Soar I used the instructions on the building Soar page, using the "Building on Linux" part of the document. I just needed to install the necessary prerequisites, and then run
python scons/scons.py allI did not yet experiment further with Soar, but it looks like this system has a lot of stuff I would need. I still prefer to invent my own artificial intelligence algorithms, but it looks like I should at lest study closely how Soar does it's stuff.
June 26th, 2016 - First compile of piro2 sources
Today I started working on the piro2 source code. I copied some parts of the code of the original piro that I think I will need also in piro2, and tried to compile the program. So this basically meant checking my development environment is up and running properly, I have all the needed libraries installed, etc.
I needed to add OMX_SKIP64BIT define to get my code to compile, probably because the CPU in the new Raspberry Pi 3, is actually a 64-bit processor. After that I managed to get my code to build.
June 25th, 2016 - Amazon Alexa experiments
I prefer having the speech recognition and text-to-speech features running locally, but I thought it might be a good idea to look into utilizing Amazon Alexa as well. I found a nice tutorial Alexa Voice Service (AVS) with cURL by Miquel Mota. I registered myself as an Amazon Alexa developer, and began experimenting with the instructions on my Raspberry Pi.
After some work I managed to follow the tutorial and get a simple request and reply working. I had some trouble with the following issues, so I'll write those here for future reference:
- The Device ID is case sensitive.
- All the requests need to be sent from the same machine. This is pretty obvious considering the authorization requests.
- I kept getting HTTP 204 errors, but simply retrying the command helped.
June 24th, 2016 - Setting up my new Raspberry Pi 3
Okay my new Raspberry Pi arrived, so I started setting it up. I had got a Microsoft LifeCam VX-1000 from work as we moved to a new office and a lot of old stuff got thrown away (or given to employees for free). I tested that connected to my Raspberry Pi 3, but noticed that it did not have any better quality than the cheap USB web cameras I had purchased from dx.com for my original Piro project. Just as a reminder to myself, these are the commands to record audio, and to set microphone volume:
arecord -f S16_LE -r 16000 -d 5 -D hw:1,0 test.wav
amixer -c 2 sset Mic 3328
I also configured Samba access to my Raspberry Pi 3, so that I can copy files to and from it using my Windows PC. The last step was to install SVOX Pico, using the instructions from Carlo Mascellani's Raspberry Pi Experiments page. The instructions do not mention this, but I needed to run the "sudo dpkg -i ..." command also for the libttspico-dev_...deb file, to get everything working properly.
June 19th, 2016 - Piro2 work started, Raspberry Pi 3 ordered
Sorry about the lack of updates for my robot project. As I mentioned on the last blog post from 2015 I had been somewhat sick, which turned out to be a bit more serious issue. After I got well again during the spring of 2016, I built a home theater room into my new apartment. This took several months to complete, so that only in June I had time to think about possibly continuing with my robot project.
Even though the original Piro was a resonably successful project, I realized that combining speech recognition with a self-balancing robot is not a very good idea. Self-balancing requires constant running of the wheel motors, which creates noise, which causes problems with the speech recognition. Thus, after some deliberation, I decided to abandon my existing robot and instead start working on a brand new robot that would not need dynamic balancing, so that I can focus on the interesting speech recognition and artificial intellegence routines.
I ordered a new Raspberry Pi 3 from CDON.COM, and also a mini portable speaker from DX.COM. Since I did not have any old laptop speakers around any more (and I did not want to reuse parts from the original Piro), I decided to purchase a speaker that includes an amplifier, so I can simply plug it in to my new Raspberry Pi 3.
Previous blog entries
- See here for blog entries about my original Piro robot, from 2015.